Versions Compared

Key

  • This line was added.
  • This line was removed.
  • Formatting was changed.

...

Section
Column
width22


Column
width830px
Panel
borderColor#e0e0e0
bgColor#f0f0f0

In the Node Graph, right-click on the DlSettings node and choose Show Parameters in Floating Pane.


Panel
borderColor#e0e0e0
bgColor#f0f0f0

In the Image Layers section, make sure that Framebuffer is set to 3Delight Display.


Panel
borderColor#e0e0e0
bgColor#f0f0f0

Click on the primary image layer to display its Multi-light settings.

In the Multi-Light section, select the light layers to be rendered.


In this sample scene, the key lights are grouped in a rig. Rigs get their own entry multi-light list; selecting one rig in that list will render a layer containing all of the rig's lights. Independent lights are listed under the Lights section.

Panel
borderColor#e0e0e0
bgColor#f0f0f0

Right-click the DlSettings node in the Node Graph and select Preview Render. 


3Delight Display will open and show the rendering as it progresses.

Panel
borderColor#e0e0e0
bgColor#f0f0f0

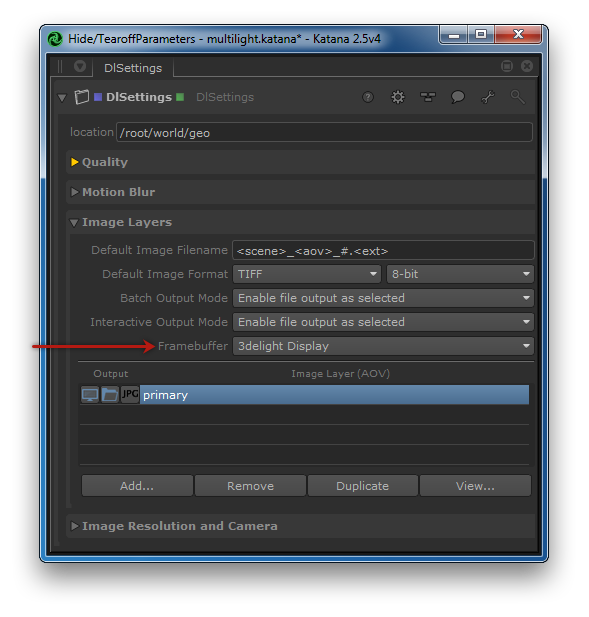
In 3Delight Display, display the contact sheet by double-click the layers icon in the Thumbnail View or .


Image Added

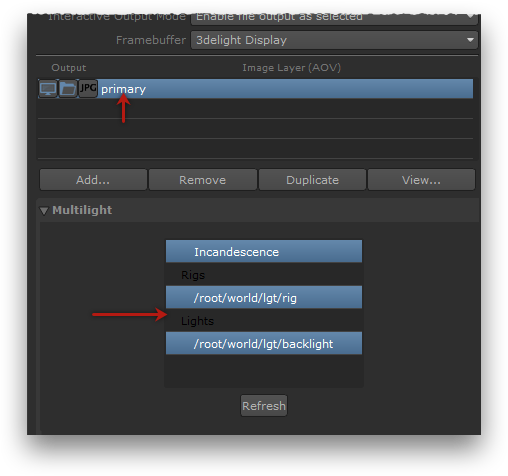
The Contact Sheet can also be displayed by choosing View → Contact Sheet.

Image Removed

All rendered layers are shown. You can see one layer per entry picked in the Multi-light list, in addition to the primary RGBA layer. Pick any layer to display it in full size by clicking on it. You can also use the page up and page down keys to cycle through the layers.  

Select the primary RGBA layer to continue.

Column
width22


...

section
Section
Column
width22


Column
width800px830px
Panel
borderColor#e0e0e0
bgColor#f0f0f0

In KATANA, double-click on the GafferThree node.

In the parameters section, unfold the rig node to display all three lights in the scene. Note their current intensity values.


Column
width22
Section
column
Column
width800px

width22
Panel
borderColor#e0e0e0
bgColor#f0f0f0

Back in 3Delight Display, open the preferences by choosing File → Preferences...


In the Preferences window, pick the General tab. Make sure the Enable interactive adjustments of lights in the scene is enabled.

Close the Preferences dialog.

Column
width22
Column
width800px

Column
width22
Panel
borderColor#e0e0e0
bgColor#f0f0f0

Bring up the Mixer by choosing Edit → Mixer...


The Mixer displays a list of lights that matches the selected entries in the Multi-LIght list of the rendering attributes.

  • Clicking on the solo gadget of a given light or rig will change the rendered image to show only that light's contribution to the rendering. At most one Mixer item can set as solo.
  • Clicking the check box gadget will toggle that light or light rig contribution to the rendered image on or off.
  • The Luminosity slider acts as an exposure on the light or light rig contribution to the rendered image.
  • The colour picker acts as a multiplier to the light source or light rig colour.
Column
width22
Section
800px
Column
width22
Column
width


Panel
borderColor#e0e0e0
bgColor#f0f0f0

Drag one of the Luminosity sliders; you will see the rendered image in 3Delight Display will conform to the modified intensity.

The intensity values of the light(s) in KATANA will change accordingly.


Column
width22


...