...
The layers of a multi-light image. Rendering such an image requires about 12% more time than rendering the RGBA "beauty" layer alone.
Rendering a multi-light image in KATANA
| Section |
|---|
| Column |
|---|
| | Panel |
|---|
| borderColor | #e0e0e0 |
|---|
| bgColor | #f0f0f0 |
|---|
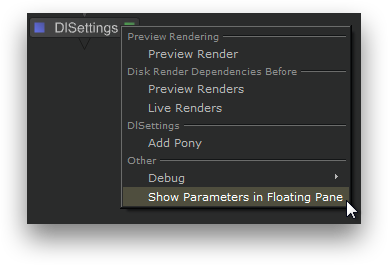
| In the Node Graph, right-click on the DlSettings node and choose Show Parameters in Floating Pane.
|
| Panel |
|---|
| borderColor | #e0e0e0 |
|---|
| bgColor | #f0f0f0 |
|---|
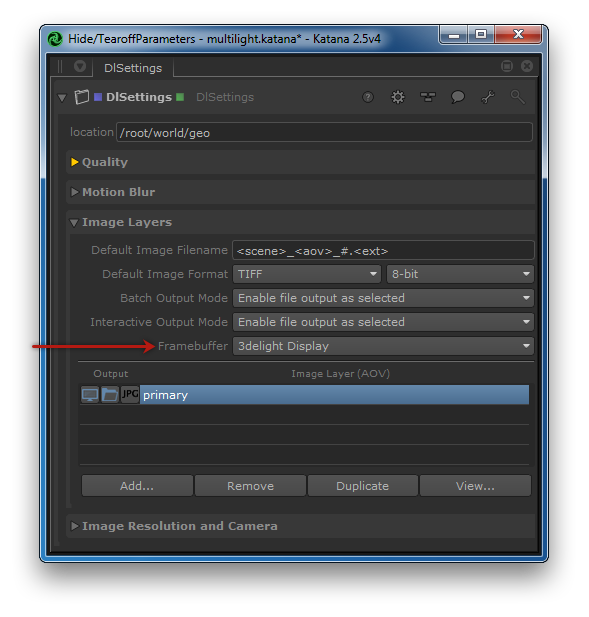
| In the Image Layers section, make sure that Framebuffer is set to 3Delight Display.
|
| Panel |
|---|
| borderColor | #e0e0e0 |
|---|
| bgColor | #f0f0f0 |
|---|
| Click on the primary image layer to display its Multi-light settings. In the Multi-Light section, select the light layers to be rendered.
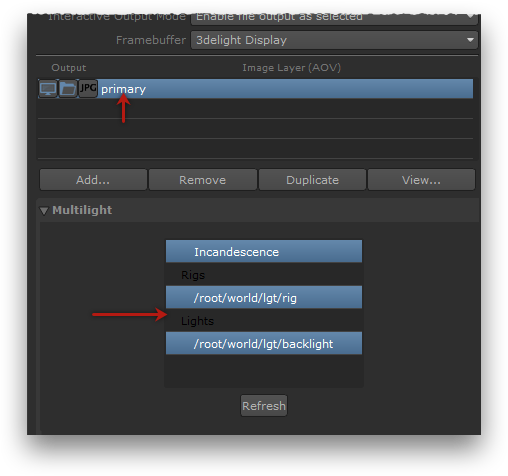
In this sample scene, the key lights are grouped in a rig. Rigs get their own entry multi-light list; selecting one rig in that list will render a layer containing all of the rig's lights. Independent lights are listed under the Lights section. |
| Panel |
|---|
| borderColor | #e0e0e0 |
|---|
| bgColor | #f0f0f0 |
|---|
| Right-click the DlSettings node in the Node Graph and select Preview Render.

3Delight Display will open and show the rendering as it progresses. |
| Panel |
|---|
| borderColor | #e0e0e0 |
|---|
| bgColor | #f0f0f0 |
|---|
| In 3Delight Display, display the contact sheet by double-click the layers icon in the Thumbnail View.

The Contact Sheet can also be displayed by choosing View → Contact Sheet. All rendered layers are shown. You can see one layer per entry picked in the Multi-light list, in addition to the primary RGBA layer. Pick any layer to display it in full size by clicking on it. You can also use the page up and page down keys to cycle through the layers. Select the primary RGBA layer to continue. |
|
|
...