| Excerpt Include | ||||||
|---|---|---|---|---|---|---|
|

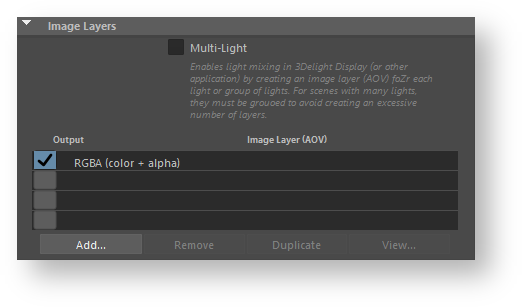
The Image Layers group
Global Options
...
Image Layers
...
Default Image Filename
Specifies the default file location for the image layers. By default, the location is based on the scene name, the render pass name and the AOV name. Paths containing dynamically some specific tokens will be expanded. These tokens are shown in the table below.
...
(
...
Default Image Format
Specifies the default file format for the image layers, including the pixel bit depth. The default is 16-bit float EXR files.
The supported file formats are:
...
TIFF
...
.tif
...
TIFF format.
...
8-bit integer
16-bit integer
32-bit float
...
OpenEXR
...
The Open EXR format.
OpenEXR is a high dynamic-range (HDR) image file format developed by Industrial Light & Magic.
...
16-bit float
32-bit float
___________
...
OpenEXR (deep)
...
.exr...
The Open EXR "deep" image format (introduced in Open EXR 2.0).
Each pixel can contain multiple values at different depths.
...
16-bit float
32-bit float
...
JPEG
...
8-bit integer
...
PNG
...
8-bit integer
16-bit integer
...
| Info |
|---|
8-bit images are saved with a sRGB gamma correction. 16-bit integer, 16-bit float and 32-bit float images are saved as "raw" data, without any gamma correction. |
Batch Output Mode
Each image layer have a file output toggle controlling wether it should be saved to file during rendering. Since these toggles may be manipulated frequently while working interactively and may be forgotten in a off position when sending the rendering to a render farm (using the Maya Batch command line), the Batch Output Mode controls wether these toggles should be ignored (overridden) when rendering in batch mode. This option is useful to make sure all image layers are saved when rendering using the Maya Batch command line, regardless of the status of the file output toggle. The options are:
...
Enable file output as selected
...
Enable all file output and selected JPEG
...
Note that during batch output, JPEG files are always output as specified by the JPEG toggle.
Interactive Output Mode
The Interactive Output Mode allows to globally control the behaviour of the file output toggles while working during an interactive session. The options are:
...
Enable file output as selected
...
Disable file output
...
Enable file output only for selected displays
...
Image Layers (AOVs) List
...
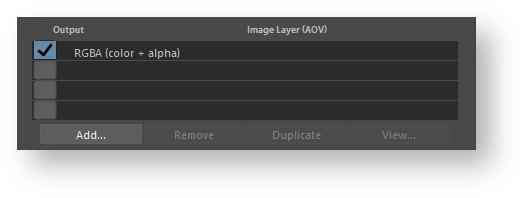
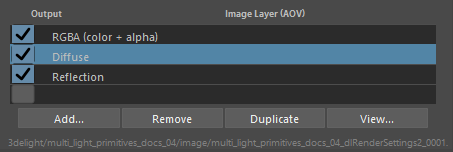
The second section of the Image Layers group is use used to specify the list all the layers that will be generated during the rendering process (subject to the selection of any of the three output toggles in te listselected output from Output group). By default, the list is populated with only one image layer, the RGBA ("Beauty") layer. When there are many layers, it is possible to re-order them in the list for organisational purpose (to visually group them). This is done through a middle-click and drag. It is a bit finicky to use though - you need to drop the layer while a line in between two layers is highlighted for the re-order to work. If you drop the layer while another layer is highlighted, nothing happens.
 List of Layers (AOVs)
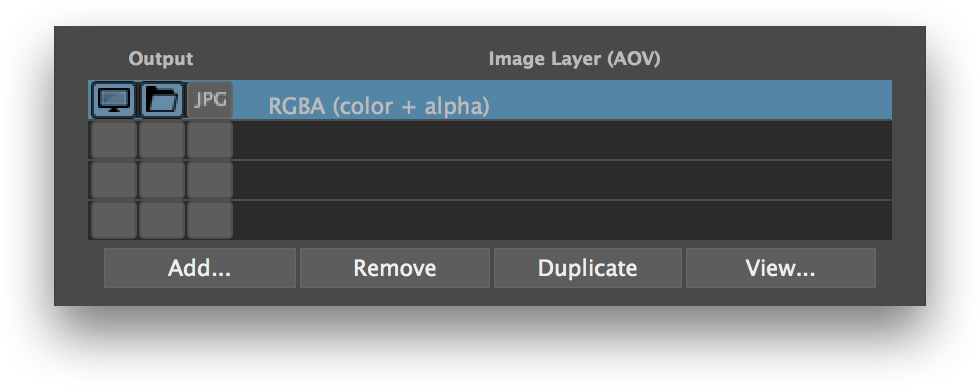
Each layer can be selected to be displayed rendered on screen while rendering or be saved to , image file or both . They can be saved in the specified format and also simultaneously in JPEG (similar in concept to a digital camera that can save simultaneously a RAW and a JPEG image). These outputs (display on screen and save to file) for each layer is controlled using three toggles located left of the layer name in the list. If no output toggles are selectedbased on the selected output from Output group. If the toggle is disabled, the image layer with its AOV is inactive.
Toggle | Output Destination |
|---|

|

enable layer | Enables |
the |
layer to be renedered in a window on screen |
(aya Render View or 3Delight Display |
), or image file, based on the output selected from Output group. Unlike 3Delight Display, the Maya Render View does not support to display simultaneously multiple layers. When this toggle is enable for multiple layers, only the first one is displayed. |

file output
Enables the output of the image layer to file using the file format and location specified by the Default Image Filename and Default Image Format attributes (unless overridden for that layer in the options listed below the list of layers).

jpeg output
Enables the output of the image layer as a JPEG. The file location is the same as specified for the standard file, only this time with the .jpg extension.
If all three toggles are selected, the image layer will be outputted simultaneously in a screen window, on file and as a jpeg. Below Below the list of layers there are four buttons. Except for Add, their function applies to the selected layers in the list:
Add...
For adding layers. The AOV Selector will pop for enabling one or more AOVs. All the AOVs selected in the AOV Selector are presented in the list of layers.
Remove
Select one or more layers in the list and press Remove to remove. Note that the RGBA ("Beauty") layer can not be removed.
Duplicate
Select a layer in the list and press Duplicate to duplicate. You can then change some of the per layer attributes for any of the duplicated layer (otherwise you simply end up with exactly the same Layer/AOV without any difference). For example, you can have two Diffuse layers saved in different file format, or each with a different Pixel Filter or Display Subset (specified in the Advanced groups of attributes).
View...
Select a layer and press View to view it. This opens the Image Filename for that layer in a viewing application. Refer to the 3Delight Preferences for how to select which application should be launched.
Per Layer Attributes
When selecting a layer (only one) in the list of layers, its attributes are listed in collapsable groups below the The expanded file name for the selected layer is shown below the Add/Remove/Duplicate/View buttons. These are per-layer attributes. The expanded file name for the selected layer is shown just above these collapsable groups.

Groups of attributes for a specific Layer
This group is to override the following attributes for the selected layer:
Image Filename
Use to override the Default Image Filename. The options are "Default" to use (not override) the Default Image Filename and "Custom" to specify a custom filename for the selected layer. When default is selected, the complete expanded filename is listed just below (expanded from the token).
File Format
To override the Default Image Format. The options are "Default" to use (not override) the Default Image Format and "Custom" to specify a custom file format, including the pixel bit depth.
It is recommended to leave these attributes to "Default" and set the file location and format using the Default Image Filename and Default Image Format at the top. This way, whenever you change these default, the change will apply to all the layers that refer to these "default" settings.