There are several ways in 3Delight for Maya to create a new Render Pass, select and render Render Passes:
- Using the 3Delight
...
- Menu (from the Maya menu bar)
...
Creating a render pass can be done uusing the various items found in the following Maya menu:
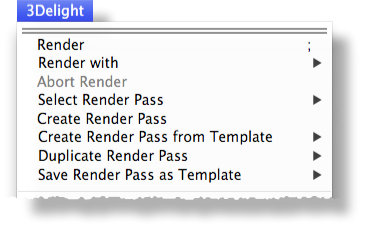
The Render Pass creation options in the 3Delight menu
3Delight -> Create Render Pass
Selecting this menu item will create a new Render Pass node with all available attributes, set to their default values. The new render pass is selected upon creation, and displayed in the Attribute Editor.
...
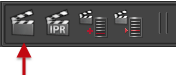
- Using the 3Delight Shelf
- Using the Render Settings window
- Using the Attribute Editor
But only the 3Delight Menu offers all the options in one place. We will use it as a guide to explain each option available to manage Render Passes. And for each option, we will indicate the alternate ways available in 3Delight for Maya to perform the same action.
3Delight Menu items for Managing Render Passes
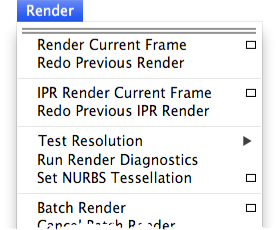
Render
Render with
The Render menu item selects 3Delight as the current renderer and starts a render using the active Render Pass in the Render Settings window. Whereas the Make Active and Render sub-menu list all the Render Passes in the scene; selecting one selects 3Delight as the current renderer, makes the select Render Passit active in the Render Settings window and renders it. 3Delight for Maya also offers a few additional ways to launch a render:
| Section | ||||||||||||||||||
|---|---|---|---|---|---|---|---|---|---|---|---|---|---|---|---|---|---|---|
|
Select Render Pass
This item is to select a Render Pass node and have it displayed in the Attribute Editor. It pops up a menu listing all Render Pass in the scene. The active Render Pass in the Render Settings window is identified by a check mark in this menu. 3Delight for Maya also offers one additional way to select a Render Pass:
| Section | ||||||||||||||||
|---|---|---|---|---|---|---|---|---|---|---|---|---|---|---|---|---|
|

Create Render Pass
Creates a new Render Pass with all available attributes set to their default values. 3Delight for Maya also offers a few additional ways to create a Render Pass:
| Section | ||||||||||||||||
|---|---|---|---|---|---|---|---|---|---|---|---|---|---|---|---|---|
|
Create Render Pass from Template
This item displays a sub-menu listing all Render Pass Templates. Selecting one will create a new Render Pass using that template. 3Delight for Maya also offers one additional way to create a Render Pass from the list of templates:
| Section | ||||||||||||||
|---|---|---|---|---|---|---|---|---|---|---|---|---|---|---|
|
Duplicate Render Pass
This item displays a sub-menu listing all the Render Passes in the scene (not the templates). Selecting one will duplicate it.
| Section | ||||||||||||
|---|---|---|---|---|---|---|---|---|---|---|---|---|
|
Save Render Pass as Template
A Render Pass can be saved as a template to add it to the list of templates. All templates are listed in the Create Render Pass from Template menu. This could be useful for example to create a standard pre-defined Render Pass across multiple scenes or across multiple projects. To create a Render Pass template, first create a Render Pass, rename it and configure its attributes as desired. Then select that Render Pass in the sub-menu Save Render Pass as Template to save it. This menu item lists all Render Pass in the scene. Clicking on one saves it as a template. It will now be available across multiple scenes.
| Section | ||||||||||||
|---|---|---|---|---|---|---|---|---|---|---|---|---|
|
...
This item displays a sub menu listing all existing Render Pass Templates. Selecting a template will create a new render pass with using only the template's attributes and their values. See
Using the 3Delight Shelf
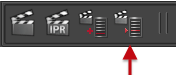
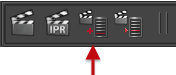
Create Render Pass shelf button
Left-clicking on this shelf button will create a new render pass node with all available attributes set to their default values. See Create Render Pass shelf button for details and right-click operations.
Using the Maya Render Settings window
In the 3Delight tab, clicking on the Create Render Pass button will create a new render pass node with all available attributes set to their default values. See The 3Delight Render Settings for details.