Overview
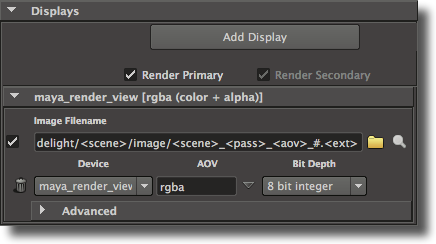
Using the Displays group of attributes the user specifies one or several layers of images to output simultaneously from the rendering process. Each can be set to be displayed on screen (in a Windowwindow) or be saved to a file or both. By default, the Display group of attributes is setup to output only one image layer: the RGBA components representing the main image, also commonly referred to as the Beauty. And it is setup to be outputted to the Maya Render View.
It is possible to add any number of layers, each set to output any complementary values to the Beauty image. These are derived from variables computed inside shaders and are commonly called Arbitrary Output Variables (AOVs). Example of layers are: depth values associated to the Beauty image, original color of surfaces (without the effect of the lighting), the specular and diffuse shading components of the Beauty image. These layers can be useful for compositors to have many options while composing the final image. Refer to Display AOVs for further details on supported AOVs.
Layers can not only be generated using different AOVs, they can also be generated from different camera angles. This is very powerful for fast simultaneous multi-camera rendering (for 3D stereo for example). Additionally, each layer can contain a different subset of the objects in the scene. These are more advance advanced options and are described in the Display Advanced Attributes.
| Info |
|---|
All the layers are rendered simultaneously. Adding many layers do not generally increase rendering time significantly. This is different and not to be confused with the 3Delight for Maya functionality of Render Passes. Those are processed sequentially and can produce totally different output from one pass to another. |
The Displays group
Adding, Removing and Selecting Layers
Among the user interface items inside the Displays group of attributes, there are a few buttons and a popup menu that are useful to add and remove layers and select if they are active or not. Here is a description of their functionalities:
| Info |
|---|
In 3Delight for Maya, each layer of images is called Display. This is because in RenderMan, the output of the rendering is specified using RiDisplay tokens. In a future an up coming release, there will be changes and improvements to the user interface for this group of attributes and the Display labelling will be modified. |
Add Display
Remove Display
Duplicate Display
To add a display, click on the Add Display button. This will add a pane for that new display. Many displays (i.e. layers) can be added this way. The Remove Display button is presented as a trashcan inside each display pane. Click on it to remove a display.
| Section | ||||||||||||
|---|---|---|---|---|---|---|---|---|---|---|---|---|
|
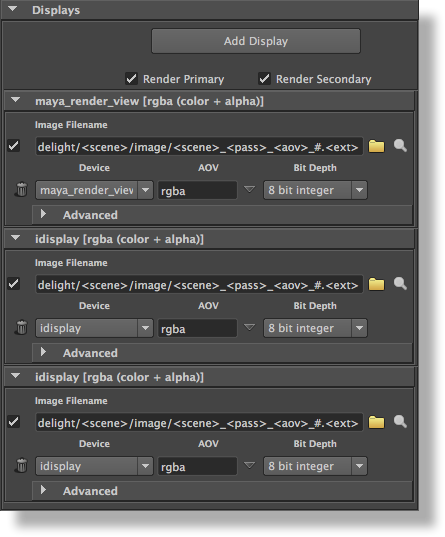
The attributes for all the displays are presented in panes below the Add Display button. Here is an example of the Display group with three displays.
Render Primary
Specifies if the primary display is to be rendered. The primary display is always the display at the top of the Displays panel and this control is tied to the first display’s Active toggle (see below). Generally, the primary display is the Beauty image simply because it is where it is first placed by default. It can be useful to turn this option off when you only need to render one or more secondary displays (such as when rendering shadow maps). By default, this toggle is on.
Render Secondary
Specifies if the other displays than the first are to be rendered. This toggle will override the per-display Active toggle (see below). This control is on by default.
...
| Section | ||||||||||||
|---|---|---|---|---|---|---|---|---|---|---|---|---|
|
| Section | ||||||||||||||||||||||||
|---|---|---|---|---|---|---|---|---|---|---|---|---|---|---|---|---|---|---|---|---|---|---|---|---|
|