Area lights have many additional options. Any geometry
can be selected to act as a mesh light.
Default Shape
Allows you to select the shape (left to right): square, sphere, disk and cylinder.
There are no images attached to this page.
Light Spread
Specifies the spread of the light. A spread of 1 is to natural "cosine" spread. Lower spreads will produce a more focused light. From left to right: 0.5, 0.2 and 1.0 (default).
There are no images attached to this page.
Normalize Intensity by Area
This will devide the total intensity of the area light by its area. The net effect of this is that no matter the scale of your area light the intensity will remain the same. This non-physical behaviour can be handy when adjusting shadows from area light: shadow softness adjustments (area light size) will not change the overall intensity. From left to right: off (default) and on.
There are no images attached to this page.
Visible to Primary Rays
Makes area light visible to primary (a.k.a camera) rays. From left to right: off (default) and on.
There are no images attached to this page.
Two Sided
When enabled, area light will illuminate from both sides. Note that this has no effect with the sphere shape. From left to right : off (default) and on.
| There are no images attached to this page. |
Select Geometry ...
This powerful 3Delight feature allows using any maya geometry as an area light. Press the Select Geometry ... button to select the geometry (or geometries) that will be part of the mesh light.
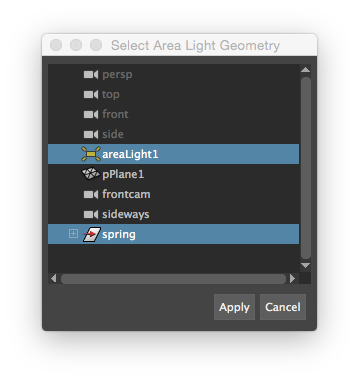
The selected geometry will :
- Be parented underneath the original area light. So the transform of the area light will be applied to the selected geometry.
- Be have the area light shader assigned.
- Inherit all the attributes of the area light (exposure, intensity, color, etc).
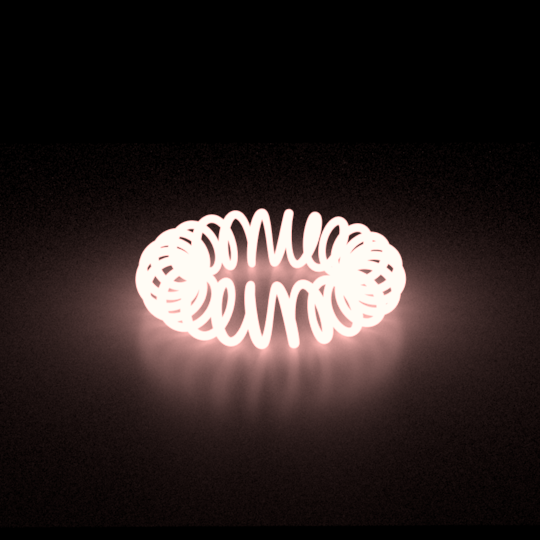
The following example shows a spring rendered as an area light. Maya scene can be found here.