There are several ways in 3Delight for Maya to create, select and render Render Passes:
- Using the 3Delight Menu (from the Maya menu bar)
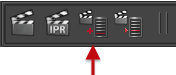
- Using the 3Delight Shelf
- Using the Render Settings window
- Using the Attribute Editor
But only the 3Delight Menu offers all the options in one place. We will use it a guide to explain each option available to manage Render Passes. And for each option, we will indicate the alternate ways available in 3Delight for Maya to perform the same action.
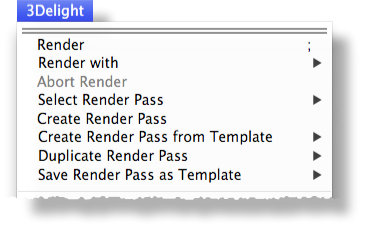
Create Render Pass from the 3Delight menu
Render
Starts a Render. The sub-menu list all the Render Passes in the scene; selecting one will render it. For convenience, the first one listed in the menu is the last rendered render pass. 3Delight for Maya also offers a few additional ways to launch a render:
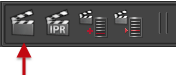
(in the 3Delight Shelf) | Clicking on this shelf button will re-render the last rendered render pass; right-clicking on this button will display a list of Render Pass; selecting one will render it. See The 3Delight Menu and Shelf for more information. |
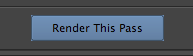
(in the Attribute Editor) | When a Render Pass is displayed in the attribute editor, a rendering can be launched simply by clicking on the Render This Pass button located at the top of the Attribute Editor. |
Render Current Frame (Maya button) | Render -> Render Current Frame If Maya’s current renderer in the Render Settings is set to ‘3Delight’, selecting one of these options will launch a rendering using the current Render Pass as set in the '3Delight' tab of the Maya Render Settings window. Launching a rendering this way can have an impact on some default values used for rendering; refer to Rendering Attributes for details. |
Selecting a Render Pass to render also marks it as the last rendered render pass. And this has no effect to which Render Pass is shown in the Render Settings window or Attribute Editor. It means they each can show and edit a different pass than what is rendered by Render.
Select Render Pass
Pops up a menu listing all Render Pass in the scene, starting with last rendered render pass. Selecting one displays it in the Attribute Editor. 3Delight for Maya also offers one additional way to select a Render Pass:
| Pops up a menu listing all Render Pass in the scene, starting with last rendered render pass. Selecting one displays it in the Attribute Editor. See The 3Delight Menu and Shelf. |
Not equivalent: (in Render Settings) | In Render Settings you can select a Render Pass that will be displayed in that window only (not in the Attribute Editor). This is not to be confused with the Select Render Pass of the 3Delight Menu we have just explained. This is mentioned here only as supplemental information. |

The Select Render Pass button and menu item do not select the Render Pass the Render button will render; the Render button renders the last rendered render pass. Only by right-clicking on the Render button you can select what Render Pass the Render button will render.
Create Render Pass
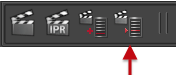
Creates a new Render Pass with all available attributes set to their default values. 3Delight for Maya also offers a few additional ways to create a Render Pass:
(in the 3Delight Shelf) | Creates a new Render Pass with all available attributes set to their default values. Right-clicking on this button instead is the equivalent to Create Render Pass from Templates explained below. |
(in Render Settings) | It is also possible to create a new Render Pass using the Create Render Pass button in the 3Delight tab of the Render Settings Window. |
Create Render Pass from Template
This item displays a sub-menu listing all Render Pass Templates. Selecting one will create a new Render Pass using that template.
Duplicate Render Pass
This item displays a sub-menu listing all the Render Passes in the scene (not the templates). Selecting one, will duplicate it.
(in the 3Delight Shelf) | Right-clicking on the button pops up a menu listing all Render Pass Templates; selecting one will create a new Render Pass using that template. |
Any new Render Pass node that is created (using Create Render Pass, Create Render Pass from Template or Duplicate Render Pass) is automatically selected in Maya upon creation and displayed in the Attribute Editor where it can be given a new name.
Save Render Pass as Template
A Render Pass can be saved as a template to add it to the list of templates in the scene. All templates are listed in the Create Render Pass from Template menu. This could be useful for example to create a duplicate of a Render Pass across multiple scenes. To create a Render Pass template, first create a Render Pass, rename it and configure its attributes as desired. Then select that Render Pass in the sub-menu Save Render Pass as Template to save it. This menu item lists all Render Pass in the scene. Clicking on one saves it as a template.
Each template is saved in a separate file in the template folder as specified in the 3Delight Data Locations window. The default location puts it inside the Maya Project, which is good if you want to share the templates among all the scenes in your project. But is not a good location if you want to share these templates among different projects. In this case, you are advised to change it to a location of your choice.