Overview
This section details the various extension attributes that are found in every Maya light shapes. It also explains extension attributes that appear only in area light shapes.
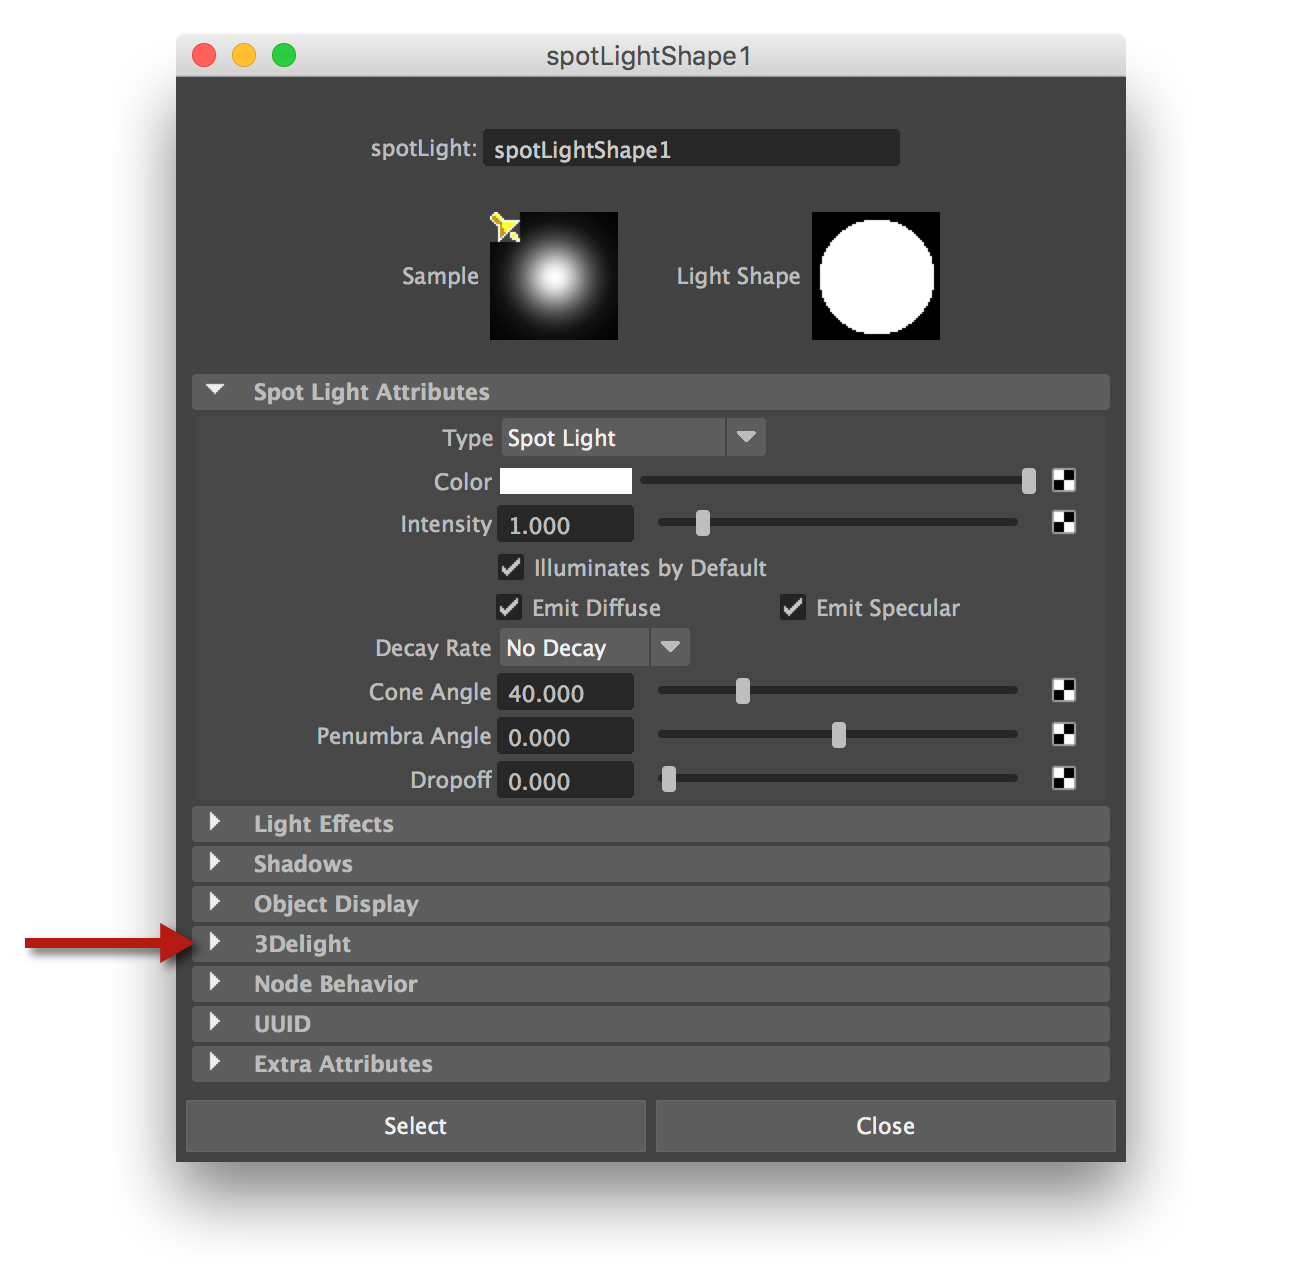
The location of the 3Delight attributes for a spot light shape.
Common Extension Attributes
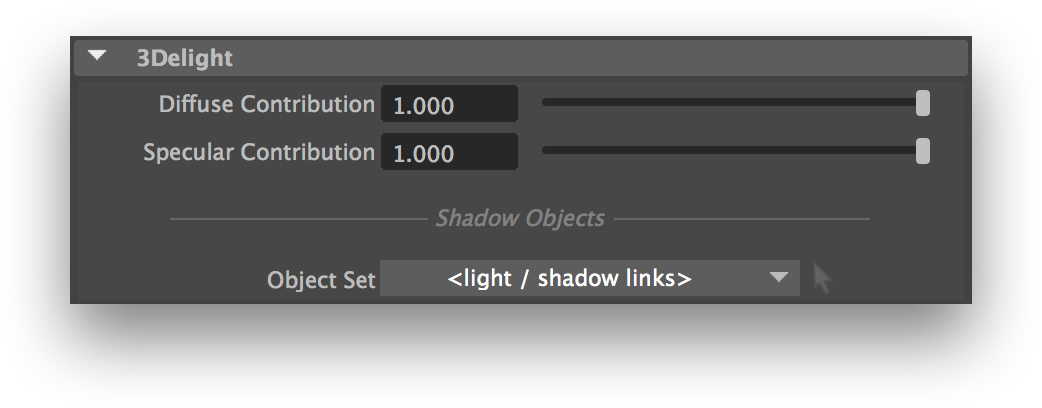
3Delight Extension Attributes that exist for all Maya light types.
All Maya lights have the following attributes available in the 3Delight group:
Diffuse Contribution
Specular Contribution
These two attributes allows adjusting the contribution of the light to the diffuse or specular shading components. For instance, setting Diffuse Contribution to 0 makes the light a purely specular one; it has the same effect as turing off the light's Emit Diffuse control.
Please note that turning off Emit Diffuse will make Diffuse Contribution controls insensitive; in a similar fashion, turning off Emit Specular will make the Specular Contribution controls insensitive. The Emit Diffuse and Emit Specular controls are located in the light shape's main attribute section, a bit below the light's Intensity control.
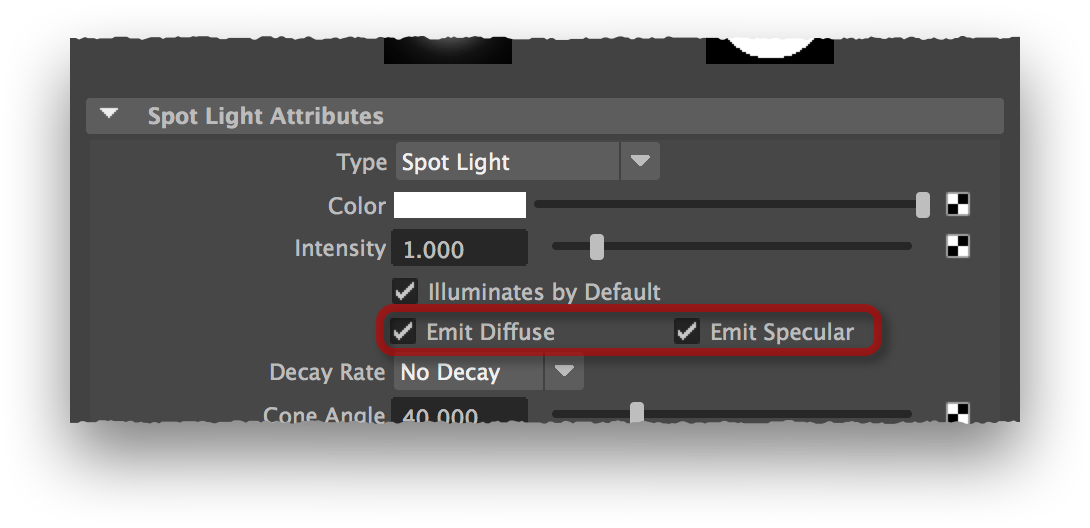
Emit Diffuse and Emit Specular controls must be enabled to allow adjusting the Diffuse Contribution and Specular Contribution, respectively.
Shadow Objects
This attribute allows specifying an object set; only the components of that set will cast shadows from the light. By default, 3Delight for Maya follows normal light linking mechanism for shadowing; this is what will be done when this attribute is set to '<light / shadow linking>'.
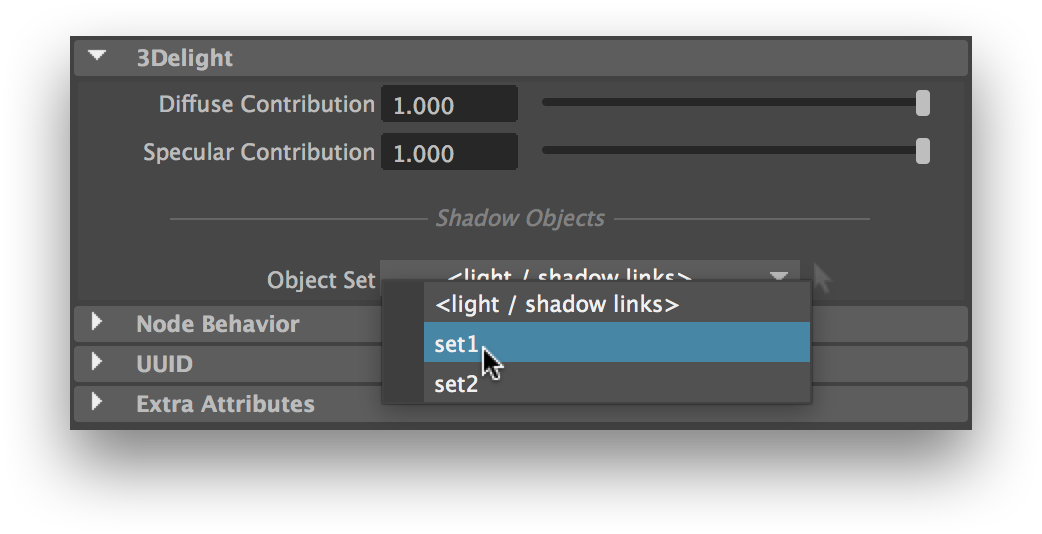
Selecting a Shadow Objects set; the option menu shows all available object sets in the scene.
Area Light-Specific Extension Attributes
In addition to the extension listed above, 3Delight for Maya offers several more attributes for area lights.
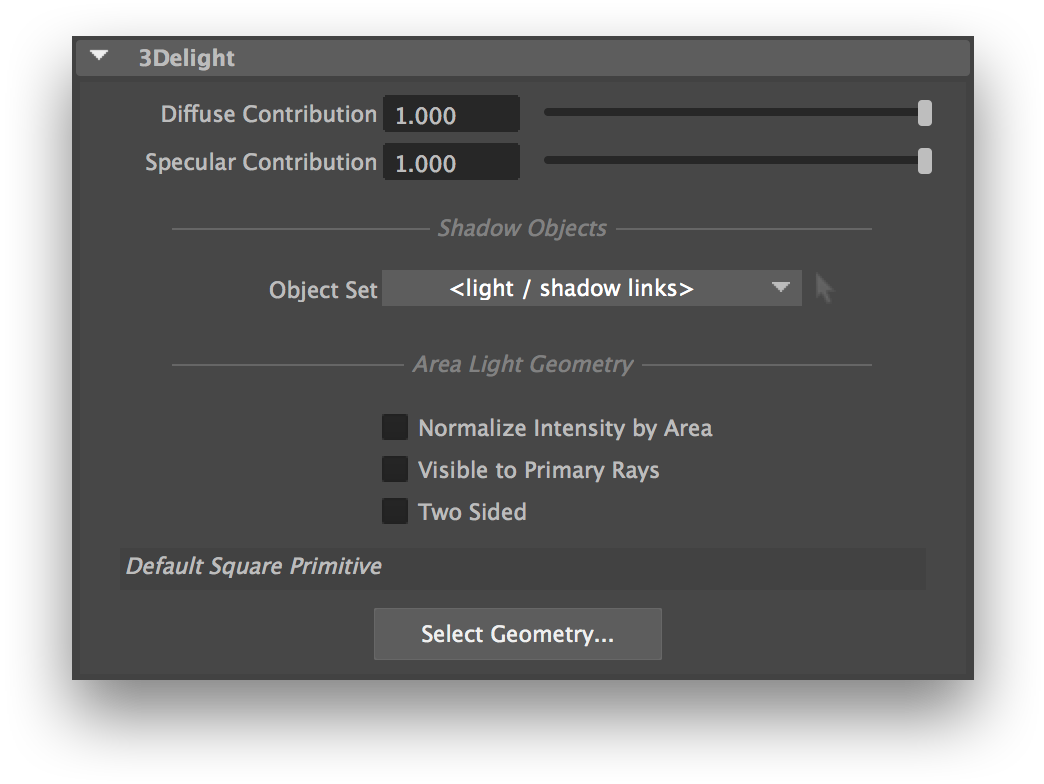
Extension Attributes offered for an area light shape.
Normalize Intensity by Area
When this attribute is off, the Intensity attribute controls the amount of light emitted by area unit of the light's geometry. In other words, if an area light is duplicated and scaled to be larger, it will appear to emit more light than the original. Turning this attribute on will scale down the Intensity by the light geometry's area. Put differently, it will make the quantity of light emitted by the area light appear constant when it is scaled or set to use a different geometry. This attribute is off by default.
Visible to Primary Rays
This will make the area light gemoetry visible to primary (aka "camera") rays. Note that the area light geometry won't cast any shadows in the scene.
Two Sided
When two sided, the areal light will illuminate from both sides of the geometry.
Area Light Geometry
By default, the area light will be shaped as it appears in the viewport: a square, altered by the transformation defined for the area light shape. To use any model in the scene to define the shape of the area light, click Select Geometry... A new Select Area Light Geometry window will appear, containing an outliner.
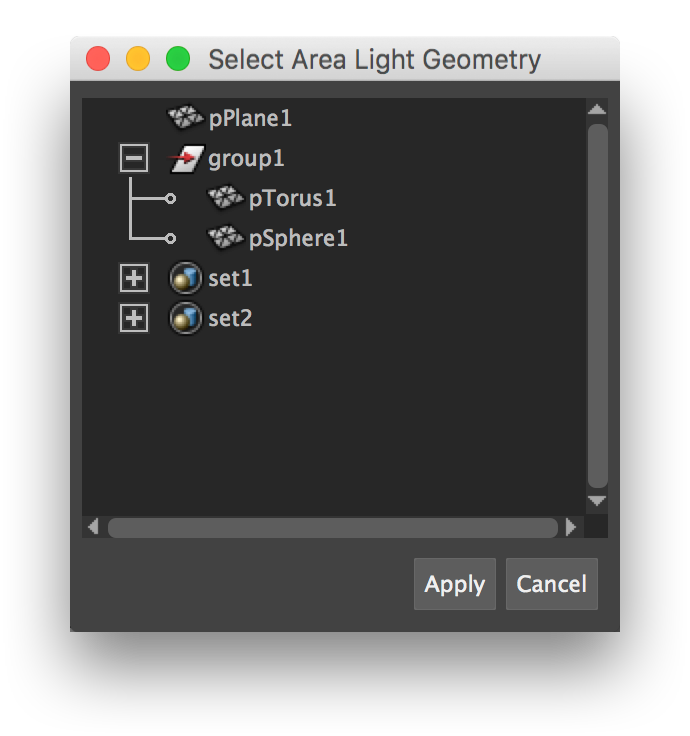
The Select Area Light Geometry window.
The geometry currently set as the area light geometry will be highlighted. By default, nothing is highlighted. Click shapes to select them independently; click groups to select all of their children, or click sets to select all of their members, as the area light geometry. Set members will be flattened - in other words, any set members that are sets will be expanded so their children are used as area light geometry. Click Apply to make the selected elements used as the area light geometry list. Click Cancel to close the window without modifying the area light geometry list.
- Objects listed as area light geometry will not be visible in the final render; they are only used for shaping the area light.
- Unless Default Square Primitive appears in the list, the area light shape's transform will be ignored. Each object of the list will retain its position.