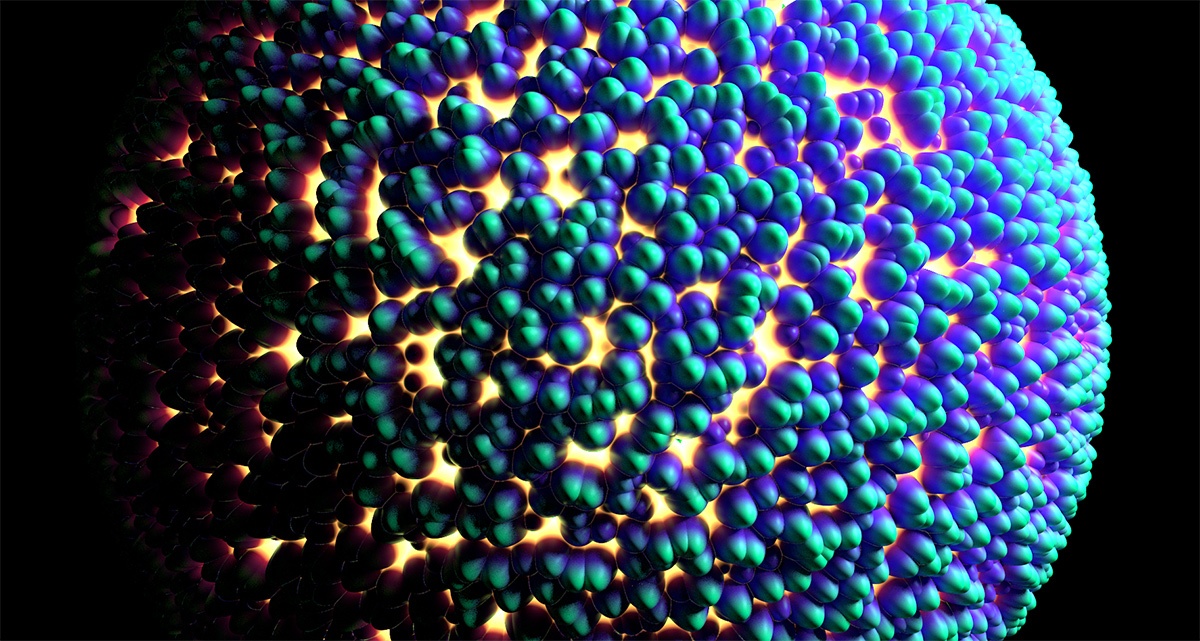
Sample Render using the custom Voronoi 3D Texture Node.
The following package contains all the material described in this tutorial: Custom_Hypershade_Nodes.zip.
| Section | |||||||||||||||||||
|---|---|---|---|---|---|---|---|---|---|---|---|---|---|---|---|---|---|---|---|
|
Main Components
Three components are needed to create a single shader:
The shader or texture source code, in RenderMan Shader Language.
- A Maya Python file to act as a plug-in that registers.
- A Maya template file for the UI.
Optionally, it is possible to add icons to have a better visual representation of the node inside Hyerpshade and the Outliner.
The following table shows where each component should be installed for a Maya 2015 package.
| Component | Installation Environment Variable | Default Location |
|---|---|---|
| RSL source code | _3DFM_SL_INCLUDE_PATH | C:\Program Files\3Delight\maya\rsl |
| Maya Python Plug-in | MAYA_PLUG_IN_PATH | C:\Program Files\3Delight\maya\2015\plug-ins |
| Maya Attribute Editor Template File | MAYA_SCRIPT_PATH | C:\Program Files\3Delight\maya\2015\scripts |
| Icons | XBMLANGPATH | C:\Program Files\3Delight\maya\2015\icons |
Creating a Custom 3D Texture Node
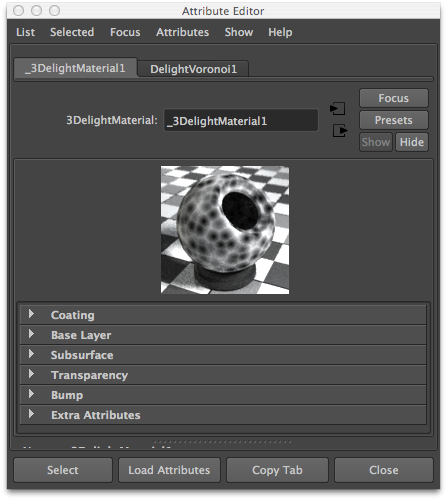
After correctly providing the three components, you will be able to render using the new texture as with any other Maya 3D Texture.
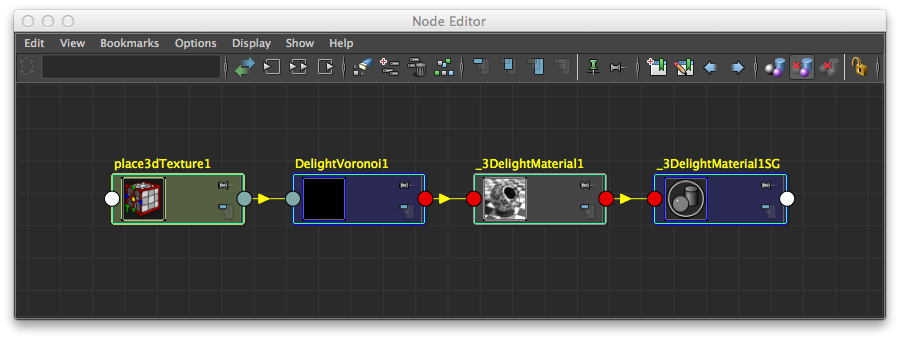 The Voronoi node viewed in the Node Editor. Note how
 place3dTexture node is automatically supported.
 Voronoi noise connected to the 3Delight Material.
The RenderMan Source Code
The Voronoi texture looks like a standard RenderMan Shading Language function but with some added structure:
- A comment block at the beginning to tell 3Delight for Maya what are the inputs and outputs.
- A naming convention for the function name.
The source code for our voronoi texture follows. It should be included inside a directory defined by the environment variable _3DFM_SL_INCLUDE_PATH, as explained above, and named 3DelightVoronoi.h.
| Code Block | ||||||||
|---|---|---|---|---|---|---|---|---|
| ||||||||
#ifndef __3DelightVoronoi_h
#define __3DelightVoronoi_h

/*
begin inputs
	float jitter
	uniform matrix placementMatrix
end inputs

begin outputs
	color outColor
end outputs

begin shader_extra_parameters Pref_param
	varying point Pref = 0;
end shader_extra_parameters
*/

#include "texture3d.h"
#include "utils.h"
#include "noise_utils.h"

void maya_3DelightVoronoi(
		float jitter;
		matrix placementMatrix;
		output color outColor;)
{
float edgeDist;
float outside;
varying point pp = transformP(1, 0, placementMatrix, 1, edgeDist, outside);

point thiscell = point (floor(xcomp(pp))+0.5, floor(ycomp(pp))+0.5,
			floor(zcomp(pp))+0.5);

float f1 = 1000;
uniform float i, j, k;
for (i = -1;  i <= 1;  i += 1)
	{
	for (j = -1;  j <= 1;  j += 1)
		{
		for (k = -1;  k <= 1;  k += 1)
			{
			point testcell = thiscell + vector(i,j,k);
			point pos = testcell + jitter * (vector cellnoise (testcell) - 0.5);
			vector offset = pos - pp;
			float dist = offset . offset; /* actually dist^2 */
			if (dist < f1)
				{
				f1 = dist;
				}
			}
		}
	}

f1 = sqrt(f1);
outColor = color (f1);
}

#endif /* __3DelightVoronoi_h */ |
The Python Plug-in
The python module is the plug-in source code per say. You must load this plug-in in Maya's Plugin Manager.
| Info |
|---|
You need a node ID for your shader plug-in. If your plug-in is for in-house use only, simply choose one from the available internal node IDs (range from 0 to 0x7ffff). If your nodes are to be made public then you would need to reserve a node ID with Autodesk. All this is explained in the following page: |
| Code Block | ||||||||
|---|---|---|---|---|---|---|---|---|
| ||||||||
# imports import maya.OpenMaya as OpenMaya import maya.OpenMayaUI as OpenMayaUI import maya.OpenMayaMPx as OpenMayaMPx import math, sys dlNodeClassify = "rendernode/delight/texture:texture/3d" dlNodeId = OpenMaya.MTypeId(0x00x1) # Node definition class DL_Voronoi(OpenMayaMPx.MPxNode): # class variables jitter = OpenMaya.MObject() placementMatrix = OpenMaya.MObject() outColor = OpenMaya.MObject() def __init__(self): OpenMayaMPx.MPxNode.__init__(self) def compute(self, plug, dataBlock): return OpenMaya.kUnknownParameter ################################################################################ def nodeCreator(): return OpenMayaMPx.asMPxPtr(DL_Voronoi()) def nodeInitializer(): num_attr = OpenMaya.MFnNumericAttribute() matrix_attr = OpenMaya.MFnMatrixAttribute() # input jitter DL_Voronoi.jitter = num_attr.create( "jitter", "ji", OpenMaya.MFnNumericData.kFloat, 1 ) num_attr.setKeyable(1) num_attr.setConnectable(0) # input placementMatrix DL_Voronoi.placementMatrix = matrix_attr.create ( "placementMatrix", "pm" ) matrix_attr.setKeyable(1) matrix_attr.setReadable(0) # output color DL_Voronoi.outColor = num_attr.createColor( "outColor", "oc" ) num_attr.setStorable(0) num_attr.setWritable(0) # add attributes DL_Voronoi.addAttribute( DL_Voronoi.jitter ) DL_Voronoi.addAttribute( DL_Voronoi.placementMatrix ) DL_Voronoi.addAttribute( DL_Voronoi.outColor ) # attributes affects DL_Voronoi.attributeAffects( DL_Voronoi.jitter, DL_Voronoi.outColor ) DL_Voronoi.attributeAffects( DL_Voronoi.placementMatrix, DL_Voronoi.outColor ) ################################################################################ # initialize the script plug-in def initializePlugin(mobject): mplugin = OpenMayaMPx.MFnPlugin(mobject) # register node try: mplugin.registerNode("3DelightVoronoi", dlNodeId, nodeCreator, nodeInitializer, OpenMayaMPx.MPxNode.kDependNode, dlNodeClassify) except: sys.stderr.write("Failed to register node 3DelightVoronoi" ) raise # uninitialize the script plug-in def uninitializePlugin(mobject): mplugin = OpenMayaMPx.MFnPlugin(mobject) # deregister node try: mplugin.deregisterNode(dlNodeId) except: sys.stderr.write( "Failed to unregister node 3DelightVoronoi" ) raise |
The MEL Attribute Editor Template
This template file creates the UI for the different parameters of your texture. In this case, we only have one such parameter.
| Code Block | ||||||||
|---|---|---|---|---|---|---|---|---|
| ||||||||
global proc
AE3DelightVoronoiTemplate(string $node)
{
editorTemplate -beginScrollLayout;
	editorTemplate -label "Jitter" -addControl "jitter";

	editorTemplate -suppress "placementMatrix";

	editorTemplate -suppress caching;
	editorTemplate -suppress nodeState;
editorTemplate -endScrollLayout;
}
|
Creating a Custom Shader Node
Writing a shader node is as easy as developing a texture node. We provide the tree main components below, they follow the same logic and structure as for texture node above.
| Code Block | ||||||||
|---|---|---|---|---|---|---|---|---|
| ||||||||
/*
begin inputs
	color color
end inputs
begin outputs
	color outColor
	color outTransparency
end outputs
*/

#ifndef __3DelightExampleShader_h
#define __3DelightExampleShader_h

void maya_3DelightExampleShader(
		color i_color;
		output color o_outColor;
		output color o_outTransparency;)
{
	extern normal N;
	o_outColor = i_color * diffuse( normalize(N) );
	o_outTransparency = 0.0;
}

#endif /* __3DelightExampleShader_h */ |
| Code Block | ||||||||
|---|---|---|---|---|---|---|---|---|
| ||||||||
# imports import maya.cmds as cmds import maya.OpenMaya as OpenMaya import maya.OpenMayaUI as OpenMayaUI import maya.OpenMayaMPx as OpenMayaMPx import math, sys dlNodeClassify = "swatch/delightShaderSwatchRender:shader/surface" dlNodeClassify_2015 = "shader/surface:swatch/delightShaderSwatchRender" dlNodeId = OpenMaya.MTypeId(0x0) # Node definition class DL_exampleShader(OpenMayaMPx.MPxNode): # class variables color = OpenMaya.MObject() outColor = OpenMaya.MObject() outTransparency = OpenMaya.MObject() def __init__(self): OpenMayaMPx.MPxNode.__init__(self) def compute(self, plug, dataBlock): if plug != DL_exampleShader.outColor and plug.parent() != DL_exampleShader.outColor: return OpenMaya.kUnknownParameter # Just transfer color to outColor resultColor = dataBlock.inputValue( DL_exampleShader.color ).asFloatVector() # set ouput color attribute outColorHandle = dataBlock.outputValue( DL_exampleShader.outColor ) outColorHandle.setMFloatVector(resultColor) outColorHandle.setClean() ################################################################################ def nodeCreator(): return OpenMayaMPx.asMPxPtr(DL_exampleShader()) def nodeInitializer(): nAttr = OpenMaya.MFnNumericAttribute() # input color DL_exampleShader.color = nAttr.createColor( "color", "c" ) nAttr.setKeyable(1) nAttr.setStorable(1) nAttr.setReadable(1) nAttr.setWritable(1) nAttr.setDefault(0.5, 0.5, 0.5) # output color DL_exampleShader.outColor = nAttr.createColor( "outColor", "oc" ) nAttr.setKeyable(0) nAttr.setStorable(0) nAttr.setReadable(1) nAttr.setWritable(0) # output transparency DL_exampleShader.outTransparency = nAttr.createColor( "outTransparency", "ot" ) nAttr.setKeyable(0) nAttr.setStorable(0) nAttr.setReadable(1) nAttr.setWritable(0) # add attributes DL_exampleShader.addAttribute( DL_exampleShader.color ) DL_exampleShader.addAttribute( DL_exampleShader.outColor ) DL_exampleShader.addAttribute( DL_exampleShader.outTransparency ) DL_exampleShader.attributeAffects( DL_exampleShader.color, DL_exampleShader.outColor ) # initialize the script plug-in def initializePlugin(mobject): mplugin = OpenMayaMPx.MFnPlugin(mobject) classification = dlNodeClassify if (float(cmds.about(version=True)) >= 2015.0): classification = dlNodeClassify_2015 # register node try: mplugin.registerNode("3DelightExampleShader", dlNodeId, nodeCreator, nodeInitializer, OpenMayaMPx.MPxNode.kDependNode, dlNodeClassifyclassification) except: sys.stderr.write("Failed to register node 3DelightExampleShader" ) raise # uninitialize the script plug-in def uninitializePlugin(mobject): mplugin = OpenMayaMPx.MFnPlugin(mobject) # deregister node try: mplugin.deregisterNode(dlNodeId) except: sys.stderr.write( "Failed to unregister node 3DelightExampleShader" ) raise |
| Code Block | ||||||||
|---|---|---|---|---|---|---|---|---|
| ||||||||
global proc
AE3DelightExampleTemplate(string $node)
{
DLM_3delightMaterialSwatchDisplay $node;

editorTemplate -beginScrollLayout;
	editorTemplate -label "Color" -addControl "color";
	editorTemplate -suppress caching;
	editorTemplate -suppress nodeState;
editorTemplate -endScrollLayout;
} |
Adding Icons for the Outliner and Hypershade
You can add icons to both the Outliner and Hypershade (this applies to both texture nodes and shader nodes). The table below details the convention for creating the icons for our Voronoi Noise.
Outliner
| HyperShade - Node Lister
| HyperShade - Work Area
| |
|---|---|---|---|
| Icon Resolution | 20 x 20 pixels | 32 x 32 pixels | 128 x 128 pixels (up to 512 x 512 pixels) |
| Format | Transparent 24 bits PNG | Transparent 24 bits PNG | Transparent 24 bits PNG |
| Naming Convention | "out_" + <node_type> + ".png" | "render_" + <node_type> + ".png" | <node_type> + ".png" |
| Example |
|
Note the transparent corners of the icon matching Maya |
|


