...
The Output group
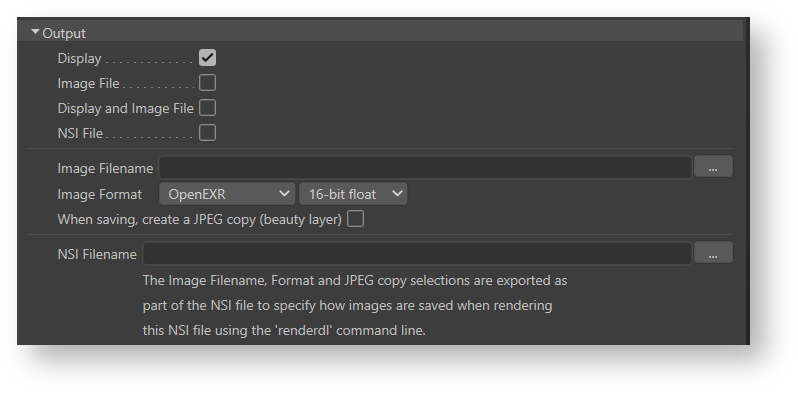
The Output group of rendering attributes specifies the details of the rendering output such as display, format and file. This applies to all image layers (AOVs).
...
Enables the display of the image in a window on screen: either in the Houdini Render the Cinema4D Render View or 3Delight Display. The selection of which window is a user preference that can be specified in the 3Delight Preferences.
| Info |
|---|
In the Houdinithe Cinema4D Render View only the first image layer (AOV) is displayed (as it does not support displaying several layers selectively). To view all the layers, you must use 3Delight Display. |
...
Specifies the file location for saving the image (or image layers). All default Houdini variables are supported in the file name.
Image Format
Specifies the format for saving the image, including the pixel bit depth. The default is 16-bit float EXR files. The supported file formats are:
...
TIFF
...
.tif
...
TIFF format.
...
8-bit integer
16-bit integer
32-bit float
...
OpenEXR
...
The Open EXR format.
OpenEXR is a high dynamic-range (HDR) image file format developed by Industrial Light & Magic.
...
16-bit float
32-bit float
___________
...
OpenEXR (deep)
...
.exr...
The Open EXR "deep" image format (introduced in Open EXR 2.0).
Each pixel can contain multiple values at different depths.
...
16-bit float
32-bit float
...
JPEG
...
8-bit integer
...
PNG
...
8-bit integer
16-bit integer
...
| Include Page | ||||
|---|---|---|---|---|
|
| Info |
|---|
8-bit images are saved with a sRGB gamma correction. 16-bit integer, 16-bit float and 32-bit float images are saved as "raw" data, without any gamma correction. |
When Saving, create a JPEG copy (beauty layer only)
...
Specifies the file location for saving the NSI file (when selecting the option NSI File for Output). All default Houdini variables are supported in the file name.
Once the NSI file is saved, you can use the renderdl command line to render the image from this NSI file. An important benefit of rendering your images this way is that it will use significantly less memory (this is because renderdl has a very small memory footprint – usually less than half compared to rendering through the DCC application).