Masks are similar to alpha channels and are convenient to separate and manipulate specific sets of objets and/or materials elements during compositing or color grading. For example, it is possible to separate foreground and background objects using masks in order to perform different colour correction on them. A common practice is to manually assign IDs and colours to specific objects or materials (using the red, green and blue channels) in order to get masks out of the renderer. Another solution is to modify shaders and add custom AOVs to output specific IDs. These tedious methods are completely superseded by the Multi-Masks feature presented here.
3Delight for Maya offers a simple method to output multiple masks simultaneously (in a single render with little impact on rendering time). Using the Multi-Mask feature is a two step process: creating a 3Delight Mask Set and then selecting it through the Image Layers group of rendering attributes. There is no limit to the number of masks that can be created and selected this way. All rendered masks can be saved separately or in the same file (using either EXR or TIFF).
Creating a 3Delight Mask Set
A mask set can be created either using the menu or the tool bar.
A 3Delight Mask Set is normal Maya set that can be edited using Maya's Relationship Editor (Windows->Relationship Editors->Sets). Here is an example showing two such sets for foreground and background objects.
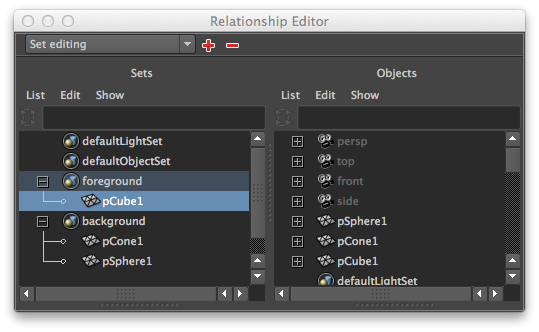 |
|---|
Outputting Masks - Method 1
As soon as a 3Delight Mask Set is created, a corresponding AOV appears in the AOV Selector in the Image Layers section of the render pass. In our example above, the AOV Selector would display two additional AOVs:
After clicking the OK button, two layers are added in the list of image layers for output:
Outputting Masks - Method 2
All 3Delight Mask Set are listed in the Multi-Mask list (below the Image Layer (AOV) list):
Result
During rendering, two mask will be rendered as shown here (the background grid is not part of the render and is there to show the alpha channel):
Mask: foreground | Mask: background |