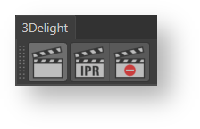


The 3Delight Shelf buttons to control renderings.
The Render button in the Render Settings.
The 3Delight menu items to control renderings.
3Delight renderings can be launched and stopped by using controls in the 3Delight Shelf, in the 3Delight menu, and in the Render Settings themselves. The Render Settings offer a button above the attributes to start a new rendering, or interrupting an ongoing one. The type of rendering can be changed by clicking on the down arrow at the right end of the button.
Starting a rendering with a specific Render Settings will always set it as active in the Cinema4D Render Settings window.
Starting an Interactive Rendering
An interactive rendering usually produces images in 3Delight Display , and optionally produces image files.
An interactive rendering can be launched by doing one of the following:
- Clicking the
 button in the 3Delight Shelf.
 - Clicking the Render button in the Render Settings.
- Choosing the 3Delight → Render menu item.
Starting a Live (IPR) Rendering
A live rendering continuously monitors the Cinema4D scene and will refresh to display the scene changes. The rendered image of the current frame is shown in 3Delight Display, without motion blur. No image files are output during a live rendering.
A live rendering can be started by doing one of the following:
- Clicking the
 button in the 3Delight Shelf (right-clicking will allow choosing which Render Settings will be used for the rendering).
 - Clicking the Live Render (IPR) button in the Render Settings.
Aborting an Ongoing Rendering
You can abort an ongoing rendering by doing one of the following:
- Clicking
 in the 3Delight Shelf.
 - Choosing the relevant item under the 3Delight → Abort Render menu.
Rendering using Command Line
Rendering NSI files (.nsi)
Rendering NSI files can be done using 3Delight's renderdl command line executable. Rendering launched this way require pre-generation of the NSI file(s). Such NSI file(s) can then be rendered directly. While generating an NSI file is an additional step, once done, rendering is more streamline in terms of resources requirement as it does not involve Cinema4D Batch and its related memory allocations.