When rendering an image with 3Delight you have three options for the computing resources to use: your workstation, a 3Delight Collective (which is a set of computers from your network) or 3Delight Cloud. When rendering from your account using any DCC (i.e. Maya, Houdini, etc), you select which options through the Processing tab in 3Delight Display as explained in details below. It does not apply to the command line 'renderdl' (which has its own set of command line options to select the resources to use).
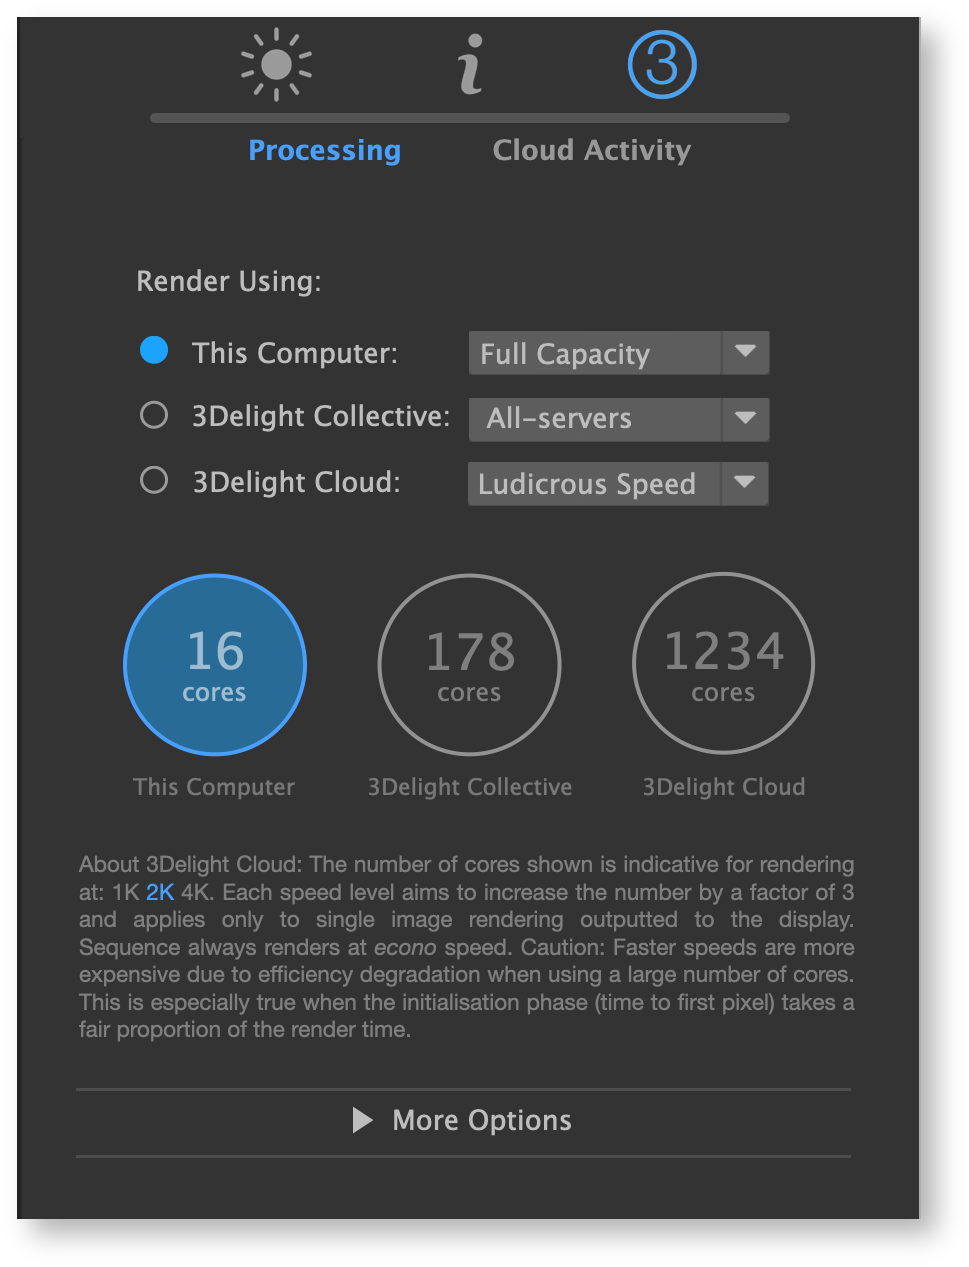
The 3Delight Processing dialog located in the sidebar of 3Delight Display.
Once a render is started using your selection (local, collective or cloud), you can immediately switch to another selection for subsequent renders. This is because all 3Delight renders are launched as background tasks and the selection started with applies until the end. An example would be to start a 3Delight Cloud sequence render and then switch to "This Computer" to immediately start rendering something else on your workstation.
This Computer
This is the most common option; using the computer you are sitting in front of to render an image. In this instance, you can select whether to render at "Full Capacity", "90% Capacity" or "Half capacity". Typically, you select Full Capacity to render as fast as possible using all the cores on your computer. If you would like to leave some processing capacity for other tasks (eg. for a more responsive UI), you can choose 90%. Or Half Capacity to leave even more. This may be recommended if you have a 3Delight Cloud sequence render running in the background (because pushing your frames to the cloud still requires a fair amount of ressources).
The number of cores (including auxiliary cores) used for rendering as a result of your speed selection will be displayed. If you see the following notice underneath it it means you are using the Free 3Delight and the number of cores has been restricted:

3Delight Collective
Select this option if you would like to render using one or several computers on your network. They will work in parallel on that image for potentially very fast rendering. For this option to be available, you must have pre-defined your collectives as explained in 3Delight Collective. Note that you can select both This Computer and 3Delight Collective together to supplement your computer to the collective.
The total number of cores available from the collective you selected will be displayed. You must have enough 3Delight licenses available for this option to work fully (i.e. as many licenses as the number of computers in the selected collective).
3Delight Cloud
Select this option if you would like to render using 3Delight Cloud. With this option, you have four speed levels to choose from. Each level aims to increase the number of cores by a factor of 3 from the previous one.
The number of cores likely to be used as a result of your speed selection for a typical 2K render will be displayed (you can change that for a 1K or 4K render within the comment underneath the cores indicators). Keep in mind that the actual number of cores used by 3Delight Cloud is proportional to the resolution of your image and is also affected by the available cloud resources. Here is how many cores are typically used at these resolutions for the four speed levels:
Speed | 2K | 4K |
|---|---|---|
| Econo | 56 cores | 224 cores |
| Normal | 168 cores | 672 cores |
| Fast | 506 cores | 2025 cores |
| Ludicrous | 1518 cores | 6072 cores |
If you see the following notice underneath the number of cores indicator it means that number has been capped by the Spending Rate Limit set for your account (which you can modify):

The speed level selection for 3Delight Cloud only applies to single image preview renders (i.e. rendering outputted to the display). The rendering of a sequence is always done at Econo speed. This is because for a sequence there is no need to rush a single image and instead several images can be rendered simultaneously and more efficiently. How many images will be done simultaneously depends on your internet speed and your Spending Rate Limit (for batch renders). You can read more about this in Cloud Rendering Speed.
Faster cloud speed are more expensive due to efficiency degradation when using a large number of cores on a single image. This is especially true when the initialisation phase (time to first pixel) takes a fair proportion of the render time.
More Options
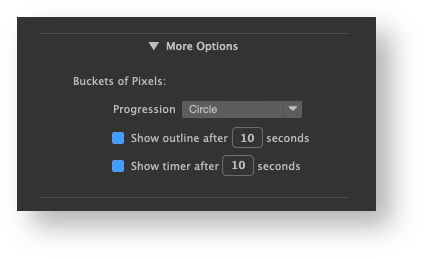
Typically, an image is rendered gradually in small groups of pixels called buckets. The following options allows you to control how the progress occurs and whether progress indicators are displayed or not.
Progression
Specifies in what order the buckets are rendered. It applies to both normal and live (IPR) renders. The options are:
Progression | Description |
|---|---|
| Horizontal | Buckets are rendered row by row, from left to right and from top to bottom. |
| Vertical | Buckets are rendered column by column, from top to bottom, and from left to right. |
| Zigzag | Buckets are rendered row by row, from left to right on even rows, and from right to left on odd rows. |
| Spiral | Buckets are rendered in a clockwise spiral starting at the centre of the image. |
| Circle | Buckets are rendered in concentric circles starting at the centre of the image. This is the default option. |
Show outlines after [ n ] seconds
Shows an outline around the bucket (or group of buckets) being processed. This outline will be shown only if the processing time exceed the "n" seconds you specified. Typically, showing such outline is not useful when buckets are calculated rapidly.
Show timer after [ m ] seconds
For buckets that are even longer to process, you can have a timer (in second) displayed over them while their processing continue. The timer will only be displayed after the bucket processing time exceeds the "m" seconds you specified.